The Crust Main Bus Design — Build a Belt Trunk That Scales
Published 2026-09-206 min read
The Crust main bus design explained: how to run a red-belt trunk underground, split oxides into per-resource storage, and feed factory rows without spaghetti.
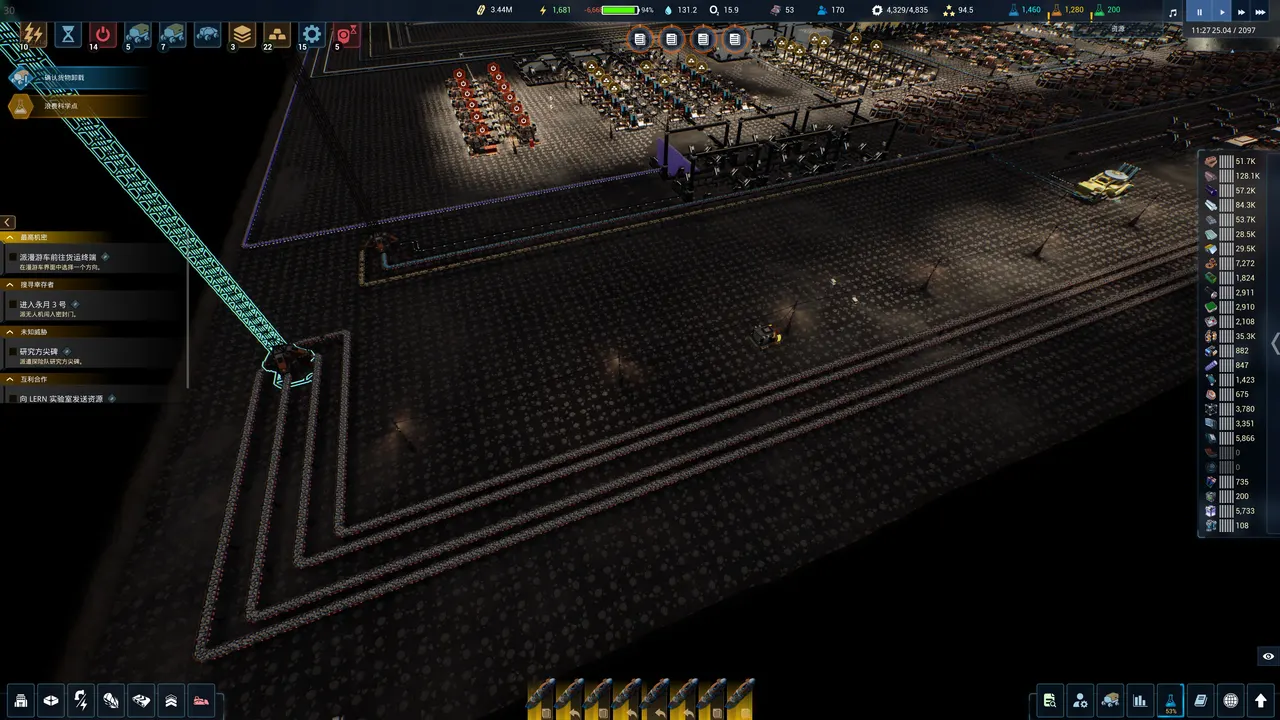
A main bus is one idea: refined oxides merge onto a few long, parallel trunk belts that run the length of your underground base, and everything downstream — smelters, factories, storage — taps off that trunk instead of machines trading belts with each other. The Crust's two-layer map makes this unusually clean, because the busiest lanes live underground where there's no terrain to fight.
The trunk pattern players converge on
A working bus documented by a Chinese player on 贴吧 (Tieba) runs like this:
- Ore comes down from the dock through the conveyor elevator — the elevator is the chokepoint (4 belts, up to 4 × 600/min), so the bus starts there, not at the machines.
- Refined oxides hit the main bus first. In this layout the trunk is red belt (T5, 600/min) — "red belts can satisfy it," and one 600/min lane backs three multi-regolith refineries' worth of output.
- Split per resource into per-ore storage: aluminum ore, titanium ore, rare earth, iron ore, silicon ore, ice, slag and helium-3 each get their own branch and their own storage yard. One resource, one lane, one place drones can find it.
- Raw stock waits on the trunk's far side. Input belts hold unprocessed material at the left edge of the underground; when a factory needs feeding, its branch pulls rightward from the waiting lanes.
- Up top, byproducts leave by elevator — slag, fuel and bricks ride a lift back to the surface, where four red belts feed the Expedition Control Center's four input ports (spread the feed across all four: lunar trucks can't be told which center to load).
Feeding smelter rows off the bus
The endgame "Laser Mission" guide on Steam describes the matching factory-side pattern:
- Smelters of one type sit side by side in a row — plan space for it.
- The input belt runs along the north side and extends rightward as you add smelters; the south side carries finished ore backward on a return lane.
- Leave room on the right to extend forever, and room on the left for about six feed belts with a gap before production starts.
- The author ran 15 smelters per resource in a row by the final mission — the bus is what makes that scale possible.
Rules that keep a bus alive
- Underground belts for crossing, surface belts for feeding. Underground segments are point-to-point — perfect for lane crossings, useless for distribution drops.
- Machines don't trade with machines. Everything meets at the bus; factory-to-factory belts are how spaghetti starts.
- Buffer at the branches. Large bulk storage at each branch absorbs rate mismatches — 5,000 items of buffer is about ten large storage containers, per the Laser Mission guide's math.
- Watch the elevator. Everything crossing layers rides it; if the bus starves, check the lift before blaming the mines.
For the machine that starts the whole chain — and the roundabout pattern that feeds it — see the multi-regolith refinery guide; for splitter priority settings on the trunk, the programmable splitter guide covers the three-chevron tool.